DIY Grocery Tote
Oregon recently passed a law banning single use plastic bags, and adding a five cent charge to paper bags in many retail situations. This has us thinking about reusable tote bags. Besides being Eco-friendly and saving you from extra charges, fabric bags are sturdier, easier to carry, and way better looking than their plastic cousins. Plus, you get a relaxing hour or two with your sewing machine. What's not to love?!
To make it super simple to craft your own bag, we've put together a free pattern, a tutorial (below), and four tote bag kits. Kits come with everything you need for a single bag: exterior linen or canvas fabric, muslin lining, and sturdy cotton webbing for handles.
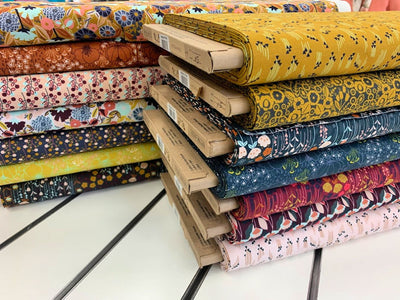
Val raided her fabric collection and generously agreed to share four of her gorgeous vintage fabrics from her lines Mystic and Quill. All four fabrics are out of print, and available only in these kits and in limited quantities. Once they're gone, they're gone for good.
Okay, let's get sewing! Follow the pattern below or download the pattern.
Cutting Instructions:
Cut 2 – 17 ½” x 18 ½” rectangles out of outside and lining fabric
Cut 2 – 22” pieces from cotton webbing
Assembly Instructions:
1. Place outside fabrics right sides together, pin around sides and bottom. Repeat with lining.
2. Using a ¼” seam allowance, stitch around bag, pivoting at the corners. Repeat with lining.
3. To create the gusset, fold the corner as shown, making sure you can feel the seams nest together. (One seam goes to the left and the other to the right.) Measure down 5” from the point, and mark a line across the triangle. Pin the fabrics together.
4. Stitch across the triangle at the pencil line, back-tacking at each end of the seam. Repeat for the other corner of the outer fabric and both corners of the lining.
5. Trim off corners 1/4” from the stitching.
6. Press lining and outside of bag. Press top edge down 1/4”.
7. Turn outside right-side out and place the lining inside, so the wrong sides are together. Line up the edge seams of both fabrics and pin in place. Lay flat on table and measure 4” from side seam edge. Place one end of cotton webbing in between the two fabrics, 1/2” from edge, and pin in place. Repeat for other side of handle. Turn bag over and pin other handle in place using the first handle for placement.
8. Pin entire top of the bag.
9. Top stitch around top of bag, 1/8” in from edge.
10. Top stitch around top of bag a second time, 1/4” in from the edge.
All done! Grab your new bag and head for the store.
Shop Supplies & Tools Shown: