Face Mask Tips, Patterns, and Information
Face masks are in desperate need and anyone who can sew can help. We've gathered the best information and patterns we could find and added some of our own tips and tricks in this post.
Let's get started with some general information and guidelines...
Each organization accepting masks has its own needs and requirements. Before you start sewing find an organization in need, get their requirements, then choose your mask pattern to fit.
Completed masks can be donated at many local hospitals. If your hospital isn't accepting masks at this time they can still be a good source of information. More organizations who may be accepting donations are hospice care, senior centers, first responders, and shelters. Other options for finding an organization in need are to contact your local quilting guild or quilt shop, join a mask making group on Facebook, ask a healthcare professional you know, or check your local news and community websites.
If you are in Central Oregon, Partners in Care (a hospice and home health organization) reached out to us and is in desperate need of masks. You can also join Central Oregon Emergency Mask Makers Facebook group. They are organizing mask making and collection, and are a great source for up to date patterns and information.
General Mask Requirements
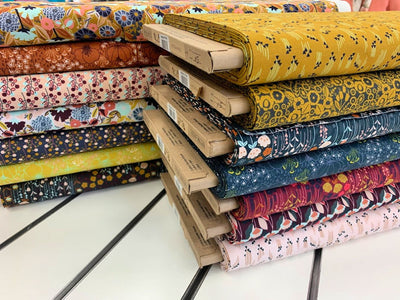
Use tightly woven 100% cotton fabric & cotton thread
Remember that both men & women need masks
Masks will be washed and sterilized before use
Any excess masks will be donated to others in need
Possible Organization Specific Requirements
No elastic (it may have latex)
Nose pocket for wire
Filter pocket
Set size
In general pleated masks with fabric or ribbon ties are preferred.
Now that you have the basics, here are some pattern options...
Mask Patterns & Tutorials
- Video tutorial- Double layer with nose wire, filter pocket and elastic from Easy to Sew
- Pattern - Double layer contour mask with ties from Free Sewing
- Pattern - Double layer with filter pocket and ties from St. Charles Hospital
Tips & Tricks (most apply to the pleated style mask)
1) Cut and sew your masks in batches. For example if you are sewing the pleated style mask, most instructions have you complete the rectangular face portion then add the ties to the sides. It's faster and easier to cut your fabric two to four times the width of a single mask, follow all the construction instructions, then measure and cut your individual masks.
This method works great for fat quarters and a pleated style mask. You can get six masks (without ties) from two fat quarters with almost zero waste. Use ribbon, bias tape, yardage, or another fat quarter for the ties.
Steps below are meant to be adapted to your patten, not a full pattern.
Place fat quarters right sides together and square up. Sew a 1/4" seam along both long edges (note: this won't work for a directional print). Cut in half lengthwise.
With one of the halves, mark and turn back cut edges 1/4" inch. Sew turned edge. Repeat this, and remaining steps, for both sides.
Lay flat and pleat both sides, using the turned edge as the top (see pleating tip below).
Square raw edges if needed and cut into three equal sections (about 7 1/4" each)
Fold right sides together and sew turned down edge in 1 3/4" from each side. This will leave a gap in the top middle of the mask to insert a filter.
Turn right sides out and press.
Add ties to the sides (see tip below) and you're done. Six masks from two fat quarters and very little time.
2) If you have pre-made bias tape or cotton ribbon, using them for ties will speed up construction significantly. Just make sure anything you use is 100% cotton, durable, and can be laundered
3) When making your own ties, use a bias tape maker or try this hack with pins. Pins should be about an iron width apart and make sure the pins you use can be ironed over. Pressing your strip in half first gives you a guide to follow as you pull your strip through the pins. Strips should be cut 1 1/2" wide by 36". Finished tie will be 3/8" wide
4) Make a paper pleating guide. Measurements shown are what we used for our fat quarter masks, alter the measurements to fit your pattern. This guide makes two pleats.
5) Use two different fabrics, one for the front and a second for the back. This helps wearers keep track of which side faces out if they need to remove the mask.
6) Tightly zigzag the ends of your ties instead of folding fabric back. This eliminates bulk that can be difficult to sew over and saves time, but still gives a finished edge.
7) Open your bias tape/ties and sew to back of mask, before sewing entire tie and top stitching on front of mask. This is more secure and much easier than worrying about catching both sides of the tie with one stitch.
If you have any tips to add, please leave them in the comments.
Organizations Accepting Masks in Central Oregon
- Partners in Care (home health & hospice care)
- Central Oregon Emergency Mask Makers Facebook group
- St. Charles Hospital
If you know of an organization that would like to be included on our list please email us at stitchin@stitchinpost.com or leave a comment.
Thanks for helping. We can do this together!