How to: Piecing Free Form Triangles with Jean Wells
Jean is a home, staying safe and busy in her studio. She wanted to share a technique she's been having fun with: piecing free form triangles.
Here are her instructions:
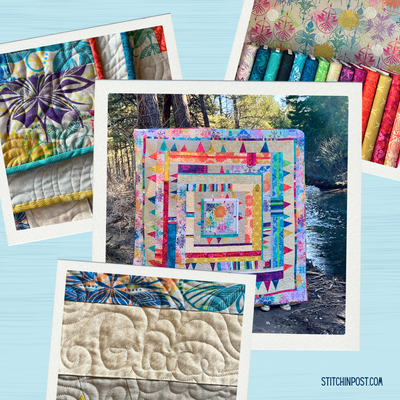
I stitched together several free form triangle blocks in a palette of fabrics from Cotton and Steel, In The Woods collection, that just called out to me to play with.
Notice in the sample above, none of the triangle shapes are exactly alike. The differences give it more of a playful feeling. Also notice that the triangle shapes do not reach the top of the blocks.
To create your own triangles...
- Cut free form triangles, no two alike. Remember to allow for a 1/4” seam allowance on all three edges.
- Measure the height of the tallest triangle and add 1 1/4” to that measurement. Cut a strip of background fabric to the measurement you just calculated, if using all the same fabric for the background. When not using the same background fabric for all blocks, cut as you go--but do make sure to have at least 1 1/4” more background fabric at the top edge of your triangle. It can always be trimmed off later.
- Lay your triangle on the background fabric right side up. Place the straight edge of a ruler along the edge of the triangle. Cut along the edge of the ruler.
- Place the background fabric on top of the triangle with right sides together. Begin at the bottom of the triangle, and stitch the fabrics together. Press the seam allowance toward the triangle.
- Place the straight edge of the ruler on the right hand side of the triangle with right side facing up. Trim off the excess background fabric at the top of the block so you have a straight edge for your next seam.
- Lay the triangle piece on the strip of background fabric right side up. Place the straight edge of the ruler along the right hand edge of the triangle and cut through the background fabric. Sew, right sides together, as you did in step 4.
- Trim your block into a rectangle as follows: Trim the bottom of your block flush with the bottom of the triangle. Cut sides a minimum of 1/4" from widest part of triangle, and the top should a minimum of 1 1/4" from the top point of the triangle.
This technique can also be used to create a border of triangles like the one below.
Keep the background fabric all the same and work from left to right inserting triangles. Cut a strip of background fabric the full length you need and cut and insert triangles one at a time as described above.