Make Your Own Veggie Bags
Every little bit helps when in comes to living greener. One way to make a difference is by using reusable produce bags, instead of plastic. While reducing your plastic use is an obvious benefit, the ventilation in mesh veggie bags can help your fruits and vegetables stay fresh longer and you can wash them right in the bag. Making your own bags also allows you to customize the bag size to the type of produce you buy regularly, getting rid of all that wadded up plastic in your vegetable drawer for a single lemon. On top of that, these bags look great, are strong, durable, and easily washable. It's pretty easy to "do the right thing" when it also makes your life easier.
Pair a set of bags with a grocery tote, some beautiful fruit, or a set of beeswax wraps for a thoughtful and useful gift any time of year. You can make up a set or two in a couple of hours max - and I don't know about you, but I'd rather spend the time with my sewing machine than braving the mall.
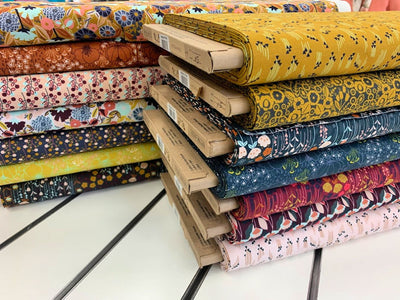
On to the good part - making the bags! First you'll need to gather your materials: stretchy, fine mesh fabric (not netting, tulle, or large mesh), fabric for the top casing, cording, and toggle closures. The key to the best bags is finding the right fabric. Make sure your fabric has a fair amount of stretch to it to accommodate all shapes and sizes of produce. It should also be soft and have small holes in the mesh. Large holes can catch on stems or leaves, damaging your bag or your produce. Lastly, you want fabric that can tolerate a cool iron. Mesh fabric has a tendency to buckle and gather a bit when sewn, and pressing is the key to flat seams.
We like Sensua Mesh fabric for this project. It has 25% four-way stretch, is 74% nylon 26% spandex, is cool iron friendly, and has tiny holes. We put together kits with everything you need to make four bags of varied sizes, or you can purchase the fabric and pattern separately. Kit's include instructions, 1/2 yard mesh fabric, casing fabric, cording, and 4 toggle closures.
We've made enough of these bags now to have a few tips to help ensure your process goes smoothly and your bags look amazing.
- Use a walking foot if you have one.
- Start and finish your seams with a "bunny tail" (a small non-mesh fabric scrap).
- Use a wider seam allowance - 3/8 to 5/8, depending on your machine and comfort level. If your seam is too narrow, the fabric can be pulled inside your machine.
- Press all your seams. The fabric is very lightweight and stretchy, so has a tendency to ripple and gather a bit, pressing will keep it flat.
- Add your cording to the casing before you stitch it to the bag - so much easier than feeding it through after! Just be careful not to sew over it.
- Cut your casing piece 1/2" longer than you need. Pause at the end of stitching it to the bag and trim it to fit exactly. (Don't forget to leave enough to fold the raw edge over.)
- Use nylon cording. You can melt the ends so it won't ravel and the cording will hold up to lots of use.
(photo shows navy mesh and old scrap fabric, not fabric included in navy kit)
If you are making the four bags from the kit, they will all fit nicely inside the smallest bag for storage. Keep a set or two in your car, purse, or inside your grocery totes and you'll always be ready. These bags also work great as a laundry bag for delicates, or to hold artisan style bread that needs to breathe.