Quick Strip Quilt Tutorial
If you're looking for quick quilting satisfaction and a beautiful finished project, a quick strip quilt is your answer.
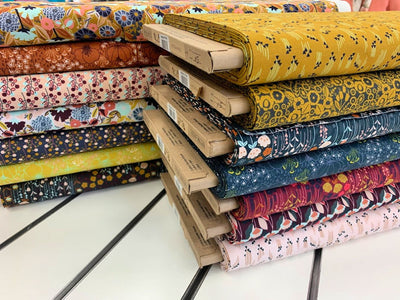
All you need for the quilt top is one 2 1/2" strip roll, thread, and a free afternoon. That's it. This quilt is so easy there is no need for a pattern. Don't worry, I'll walk you through the steps...
First, unroll your strips and organize them to your preference, within easy reach of your sewing machine. Try grouping your strips by pattern, color, or value. Go completely random if your prefer, just place your strips in a paper bag, shake them up, and pull them out as you sew.
My Marmalade Dreams roll came organized by color, and I split my strips into five color groups to pull from for my project. Beware, this quilt is a little addicting. I've already finished two and am working on a third from our Autumn Leaves batik strip roll (to match my rug). For the batik quilt I sorted my strips into seven groups.
Once your strips are organized, you're ready to sew. Grab two strips and match them up, right sides together. Sew a 1/4" seam across one short end.
You should now have a 2 1/2" by 87 1/2" long strip (assuming your strips started at 44" long). Continue adding strips until the entire roll is sewn together in a very long 2 1/2" wide strip.
I chain pieced my strips by folding over the end of the strip from the top of the last pair sewn, so it is right side up. Then I placed my next strip on top, right side down, and sewed. The pictures below show you how I did it.
You'll end up with something like this (only lots longer).
The most basic version of this quilt has you sew all your strips together, then go right into the next step. I wanted more color and pattern variation in my quilt so I added an extra step. Starting at one end of your long strip and make a cut across the strip 14" from the end.
Move to first seam, measure 14" into the second strip and cut. Repeat for the entire strip length. You'll have a pile of 39 strips, each with 1/3 of one strip and 2/3 of another.
You will also have one 14" and one 29 1/2" piece left over. Sew your two leftover pieces together. Now you have 40 strips again. Sew them all together exactly like you did in the beginning.
Pat yourself on the back. That was the hardest part of this quilt.
Next, find both ends of your long strip and put them right sides together. You are folding your strip in half lengthwise (it's still 2 1/2" wide). Ensure you don't have a twist in your strip as you are folding it. Now, sew a 1/4" seam all the way down the length of your folded strip. Cut the folded end and open up your strip. Press if desired. You should now have something 4 1/2" wide by roughly 850" long.
Repeat folding your strip in half, stitching along the length on one side, and cutting the folded end, until the quilt top has 64 rows of strips. The number of rows will double each time you sew: 1 to 2, 2 to 4, 4 to 8, 8 to 16, 16 to 32 and 32 to 64 making it a total of six seams.
The pictures above show you the progression from sewing your two row strip into a four row strip, through folding the strip to begin the next seam.
That's it, press and your quilt top is done!
Teyla says, "What? You made this for me didn't you?"
Add batting and backing, then quilt and bind it, and you have a great quilt for minimal effort. Finished size is 50" x 60".
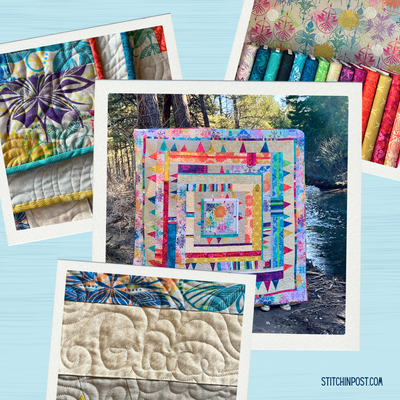
The finished quilt is a great size for couch cuddling, and is quick and inexpensive enough that I don't mind it being used by kids, dogs, and guests.
The back of this quilt is one third Marmalade Dreams theme fabric and two thirds dark blue Shot Cotton (sold out). I wanted the large solid color area to show off Annette's amazing quilting. I asked her to add our new logo bird, and I think it looks amazing! This quilt is a great project to try out some new quilting designs you've been considering. Almost any design will look good with the basic shapes of the quilt top.
Besides the two quilts already pictured, I also used up an old Christmas Fabric Strip Roll from my stash.
I told you they were addictive!
Cheers,
Samantha