Wonky Four Patch - Part 2
In Wonky Four Patch - Part 1 we talked about color mixing and grouping your fabrics. This post will cover block construction, part three will cover completing the quilt top and we will end the series with my attempts to long arm quilt for the first time.
Let's dive right in...
First, take a look at the completed quilt top. If you look closely you'll see that the top is composed of 35 four patch blocks in a 5 x 7 arrangement. Each block consists of four sections, each from a different fabric, and looks something like the one below.
If you followed along with the first post your 10" squares will already be in nine groups of four. If not, pause here and organize your fabric. Follow all the next steps for each group.
1) Stack one group (all four fabrics), lining up edges as closely as possible.
2) Cut stacked squares once vertically and once horizontally (as shown below). Cuts can be straight or angled in either direction. All cuts should be a minimum of two inches from any corner (to prevent bulk and keep pieces close in size). Vary the position of cuts for each set of four fabrics.
3) Arrange your fabric so each layer of your stack has one section of each fabric (as shown below). Karla Alexander calls this technique "stack & shuffle".
Transport your stack to your sewing area. It's finally time to sew!
I like to cut, and then immediately sew, each set of four blocks to limit my chances of confusion. I found chain piecing helped me keep all my sections in order and eliminated a lot of time starting and stopping.
If you are wondering about the blue tape on my sewing table... I use a ruler, with the needle lightly touching the 1/4 inch mark, to position the tape. Having a long line to position my fabric edge against helps me keep my seams consistent, accurate, and straight.
Using a quarter inch seam, piece the top two sections of the top block together, then the bottom two sections. Continue sewing the remaining blocks in the same manner.
You will end up with a string of eight sections (see above). Notice the colored pins in the photo, I add matching pins to both sections of a block as I sew. The pins ensure that I can pair my sections easily after I've clipped my chain apart.
Press your sections in their block pairs, pressing seams in opposite directions. Most of your sections will not have a clean straight center edge to sew (see below).
No worries, just trim the center edges of all sections straight. In other words, trim the edge where you will sew the two parts of your block together (see below).
Next, place top and bottom block sections, right sides together, with seams aligned. Your center edge will not line up yet. Measure a quarter inch from the edge to be sewn (center edge) and place a pin straight through both seams (see below).
Gently rotate the top section until center edge is lined up, being careful not to shift seam placement. I like to work on my ironing board so I can push the pin through the fabric and into the board to ensure my seams stay exactly where I want them while I line up the center edges.
Sew the block sections together. Press (seams can go in either direction). Trim your finished block to 9" square. Repeat until all blocks are completed.
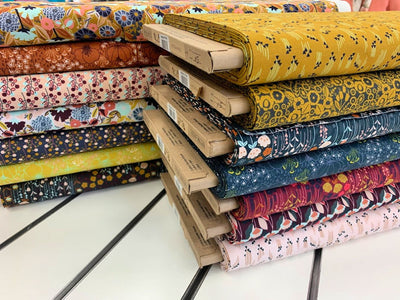
If you'd like to quilt-a-long with me, or try this project on your own, we have a number of fun 10" square bundles in stock.
From top left - Pirate's Life, Grunge Basics, Woodland Secrets, Marmalade Dreams, Betty's Luncheonette, and Kaffe Fassett Collective Fall 2018 in Night.
As always, please send me your photos or post them on social media with #stitchinpost if you try this project.
Cheers,
Samantha